AWS ECR setup to access from other accounts
AWS ECR (Elastic Container Registry) is a managed Docker hub with customizable permissions. It’s easy to setup with a single account and AWS’s documentation is pretty good enough even if you have no experience with Docker, at all. This blogpost focuses on using a central ECR with multiple accounts with complex IAM permissions.
First thing is first
First thing to accomplish is locating ECR in Services. It’s not there. The new
autocomplete UI is pretty but nothing shows up when you enter ECR. If you type
container, you’ll see only EC2 Container Service (and elastic beanstalk but who
cares). Choose EC2 Container Service, if you have used this service before then
you can click on Repositories directly. If you haven’t, click Get Started and
following screen will welcome you:
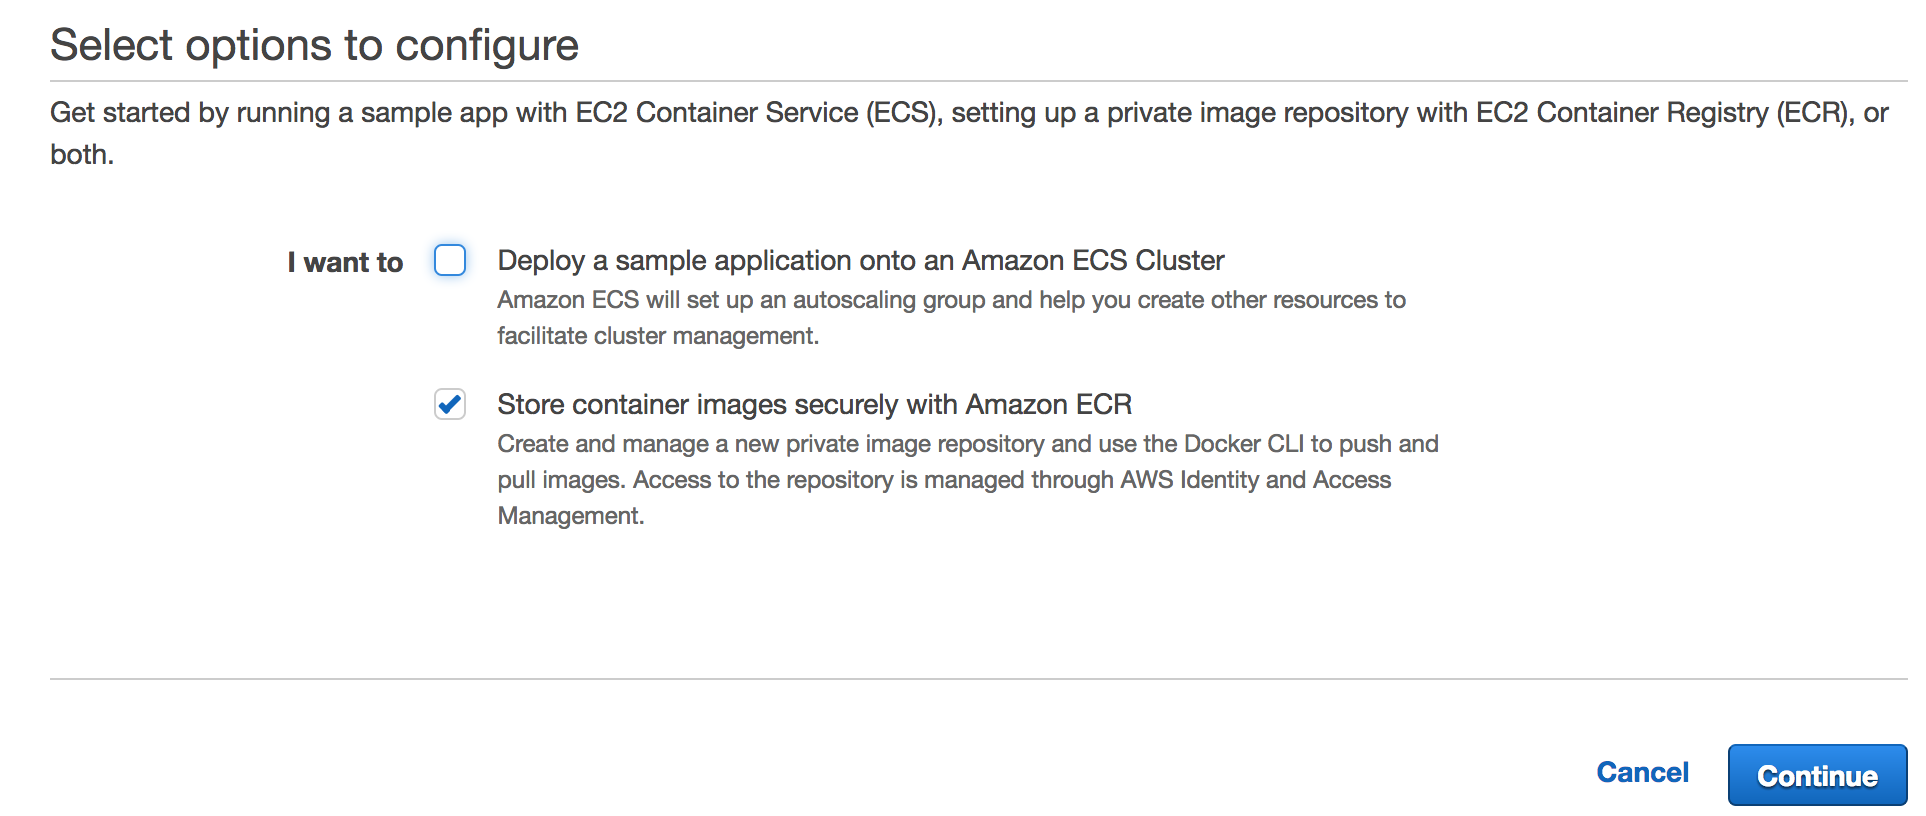
After entering a valid repository name, you are all set to start.
Pulling/Pushing images
The ECR repository page helps you with the executing basic. To try it out, you can launch an instance from EC2, install Docker, and then authenticate, push, and pull images. The last link also mentions Permissions, where you can specify which roles will have which access rights. It’s easy to do if there is only one account. Unfortunately ECR Permissions user interface is not friendly if you want to specify permissions for other accounts, you can do it only for root user of other accounts from the UI.
Configuring ECR to allow access from multiple accounts with complex IAM policies
This
guide gives instructions to allow root users of other accounts to have access
to the central registry. We will use set-repository-policy of aws cli.
At this point, I assume you have configured ECR in Account1 and launched an instance in Account1, IAM roles role2-1 and role2-2 in Account2. Let’s allow role2-1 to have push/pull access and allow role2-2 to have just pull access:
Update security policy
Login to an instance in Account1 and execute below command to get authentication token:
~ $(aws ecr get-login --region us-west-2 --registry-ids $CENTRAL_ACCOUNT_ID)
If you use docker with sudo, put sudo in the beginning: sudo $(aws ecr... Also
please replace $CENTRAL_ACCOUNT_ID with proper 12 digit id.
You can find the account id in Profile -> My Security Credentials -> Account identifiers (Remove dashes, it should be a 12 digit number). You can learn account id of Account2 the same way as we’ll need it for permissions. Now run following command to set registry policy:
#!/bin/bash
CENTRAL_ACCOUNT_ID=<account-1-id>
REPOSITORY_NAME=<repo-name>
aws ecr set-repository-policy --registry-id $CENTRAL_ACCOUNT_ID --repository-name $REPOSITORY_NAME --policy-text '
{"Version":"2008-10-17","Statement":[{"Sid":"pull and push","Effect":"Allow","Principal":{"AWS":"arn:aws:iam::<account-2-id>:role/role2-1"},"Action":["ecr:GetDownloadUrlForLayer","ecr:BatchGetImage","ecr:BatchCheckLayerAvailability","ecr:PutImage","ecr:InitiateLayerUpload","ecr:UploadLayerPart","ecr:CompleteLayerUpload"]},{"Sid":"pull only","Effect":"Allow","Principal":{"AWS":"arn:aws:iam::<account-2-id>:user/role2-2"},"Action":["ecr:GetDownloadUrlForLayer","ecr:BatchGetImage","ecr:BatchCheckLayerAvailability"]}]}'
This is a bash file and you can either save it to an .sh file or replace the
variables with actual values and run just the last line. You should replace
<account-1-id>, <account-2-id>, <repo-name>, and role names with proper values.
You should see following policy in the Permissions tab:
{
    "Version": "2008-10-17",
    "Statement": [
        {
            "Sid": "pull and push",
            "Effect": "Allow",
            "Principal": {
                "AWS": "arn:aws:iam::<account-2-id>:role/role2-1"
            },
            "Action": [
                "ecr:GetDownloadUrlForLayer",
                "ecr:BatchGetImage",
                "ecr:BatchCheckLayerAvailability",
                "ecr:PutImage",
                "ecr:InitiateLayerUpload",
                "ecr:UploadLayerPart",
                "ecr:CompleteLayerUpload"
            ]
        },
        {
            "Sid": "pull only",
            "Effect": "Allow",
            "Principal": {
                "AWS": "arn:aws:iam::<account-2-id>:user/role2-2"
            },
            "Action": [
                "ecr:GetDownloadUrlForLayer",
                "ecr:BatchGetImage",
                "ecr:BatchCheckLayerAvailability"
            ]
        }
    ]
}
This command will update the permissions of the repository, you can observe the
result in Permissions tab of the repository. The permissions of role2-1 are the
same as Push/Pull actions in adding new policy window and permissions of
role2-2 are the same as Pull only actions.
Conclusion
In the end, the users with role role2-1 are able to push and pull images and users with role role2-2 are able to only pull images. You can try by launching instances for each role type.